Screeds for Outdoor Flooring: Design and Installation Best Practices
Screeds are a critical component in the construction of durable outdoor flooring, serving as the foundation for tiles or other surface materials. This article explores the essential characteristics, installation techniques, and precautions needed to create high-quality screeds for outdoor pavements, ensuring longevity and performance under various environmental conditions.
Key Considerations for Outdoor Screeds
Outdoor screeds must withstand diverse environmental stresses, including temperature fluctuations, moisture infiltration, and freeze-thaw cycles, while supporting the intended use of the pavement, such as pedestrian walkways, driveways, or commercial loading areas. The following sections detail the critical factors in designing and installing screeds for outdoor applications:
- Resistance to Environmental Conditions
- Slope and Drainage
- Screed Thickness
- Vapor Barriers and Perimeter Strips
- Expansion Joints
- Surface Protection
- Waterproof Screeds
Resistance to Environmental Conditions
The design of an outdoor screed begins with understanding its intended use and the expected loads, whether from pedestrian traffic on a terrace or heavy vehicles in a driveway. Regardless of the application, all outdoor screeds must resist:
- Moisture Infiltration: Prolonged exposure to water can degrade the screed and compromise the overlying pavement.
- Freeze-Thaw Cycles: In colder climates, water trapped in the screed can freeze, expand, and cause cracking.
- Thermal Stress: Significant temperature swings, such as from intense sunlight to sudden rain or hail, can induce stress in the screed and pavement.
To ensure durability, the screed mix must be carefully formulated, considering:
- Aggregate Gradation: Well-graded aggregates improve strength and workability.
- Binders: High-quality cement or specialized binders enhance resistance to environmental stressors.
- Reinforcement: Fibers or mesh can improve tensile strength and crack resistance.
- Workmanship: Proper mixing, placement, and curing are essential to prevent defects.
After installation, the screed should be inspected for uniformity and compliance with design specifications before tiling to avoid issues with the final pavement.
Slope and Drainage
Proper drainage is critical for outdoor screeds to prevent water pooling, which can lead to slip hazards, ice formation in winter, or long-term damage to the pavement. According to UNI 11146 (Italian standard for concrete floor design, construction, and testing), outdoor pavements should have a minimum slope of 1.5% (15 mm per meter) to ensure adequate water runoff.
The UNI 11493 standard, which applies to ceramic tile installations, further specifies that pavements exposed to frequent wetting (e.g., rain) should have slopes between 1% and 1.5%. Importantly, this slope must be created in the screed itself, not by adjusting the tile adhesive layer. Attempting to compensate for insufficient screed slope by adding more adhesive is non-compliant with standards and can lead to uneven surfaces or adhesion failures.
Why Adequate Slope Matters
Water adheres to surfaces, even smooth ones, due to surface tension. On rough, slip-resistant tiles, this adhesion is even more pronounced, and tile joints (grout lines) further impede water flow. A slope of at least 1.5% ensures water drains effectively, reducing risks such as:
- Slip Hazards: Standing water can make surfaces slippery, especially when frozen.
- Pavement Damage: Prolonged water exposure can penetrate tile joints, leading to screed degradation or tile detachment.
In cases where existing screeds have insufficient slopes (e.g., less than 1%), tiling should not proceed until the issue is corrected, as this avoids costly repairs later. Conversely, slopes slightly above 1.5% are beneficial, provided they are consistent and well-directed toward drainage points.
Screed Thickness
The thickness of an outdoor screed depends on its intended use:
- Pedestrian Areas (e.g., walkways, terraces): A minimum thickness of 4 cm is recommended to ensure structural integrity.
- Vehicular Areas (e.g., driveways, parking lots): A minimum thickness of 5 cm is required, with reinforcement (e.g., steel mesh or fibers) to distribute loads effectively.
To maintain uniform thickness across sloped surfaces, a preliminary concrete base (often called a “subbase” or “lean concrete layer”) should be installed to level out significant elevation differences. This ensures the screed layer remains consistent, reducing the risk of differential settlement or cracking.
Vapor Barriers and Perimeter Strips
Floating Screeds
For most outdoor applications, a floating screed is recommended to isolate the screed from the underlying substrate and surrounding structures. This is achieved by:
- Vapor Barrier: A polyethylene sheet or similar membrane is placed between the screed and the subbase to prevent moisture migration from below, which could stain tile joints or cause efflorescence. The vapor barrier also acts as a “slip layer,” reducing stress transfer from the subbase to the screed.
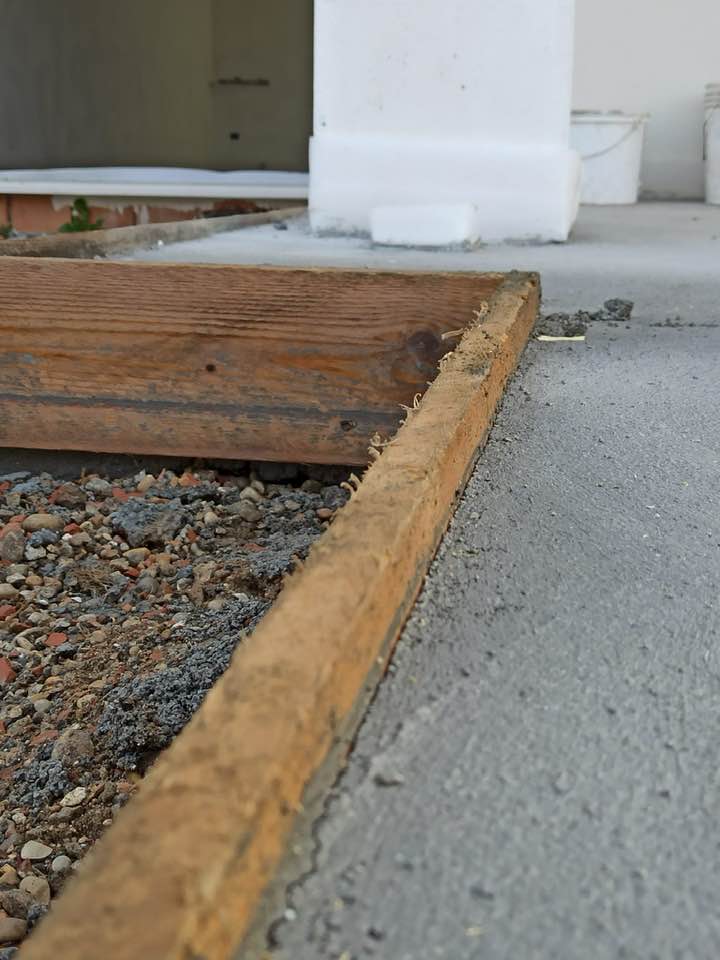
- Perimeter Strip: A 5 mm thick polyethylene strip is installed around the perimeter of the screed, along walls, columns, or drainage pipes. This strip creates a flexible joint, allowing the screed to “float” independently and accommodate thermal expansion or substrate movement without cracking.
Adherent Screeds
In specific cases, such as when space constraints limit screed thickness or when heavy loads are expected, an adherent screed may be used. In this case, no vapor barrier is installed, and the screed is bonded directly to the subbase using adhesion promoters or a cement slurry. The subbase must be mechanically sound and properly prepared to ensure a strong bond.
Expansion Joints
To accommodate thermal expansion and contraction, expansion joints must be incorporated into the screed. These are typically cut into the fresh screed and mirrored in the overlying tile layer, sealed with flexible silicone sealant matching the grout color. General guidelines include:
- Joints every 25 m² of pavement, though this varies based on site conditions (e.g., geometry, exposure, or structural transitions).
- Additional joints at changes in pavement type (e.g., from a porch to a sidewalk) or at structural discontinuities.
Proper joint placement, determined by the project engineer or site manager, is critical to prevent cracking or tile detachment.
Surface Protection
Outdoor screeds must be protected against water infiltration from both the surface and lateral edges. A common approach is to apply a liquid waterproofing membrane in two coats, with a fiberglass mesh embedded between layers for added strength. This membrane prevents water from penetrating through tile joints, which could otherwise lead to screed degradation, especially during freeze-thaw cycles.
Additionally, a waterproof perimeter band should be installed at transitions between the pavement and adjacent structures (e.g., walls or garden beds) to prevent capillary water rise, which can damage the screed or tiles over time.
Waterproof Screeds
Recent advancements in construction materials have introduced hydrophobic screeds, which are inherently waterproof throughout their entire mass, not just on the surface. These screeds:
- Resist water absorption while remaining vapor-permeable, preventing trapped moisture.
- Are available in rapid-setting formulations, reducing project timelines.
- Are suitable for both indoor (e.g., bathrooms) and outdoor applications, though they are particularly valuable for exterior pavements exposed to frequent wetting.
Using a waterproof screed can enhance the longevity of outdoor flooring, especially in harsh climates.
Installation Process for Outdoor Screeds
The installation of an outdoor screed involves several key steps:
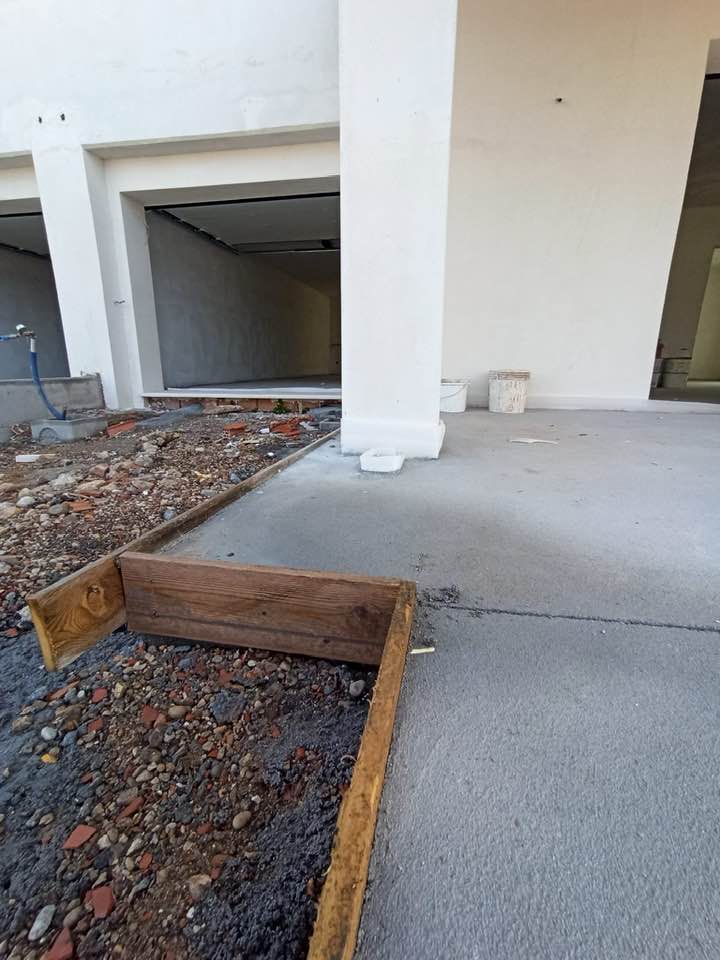
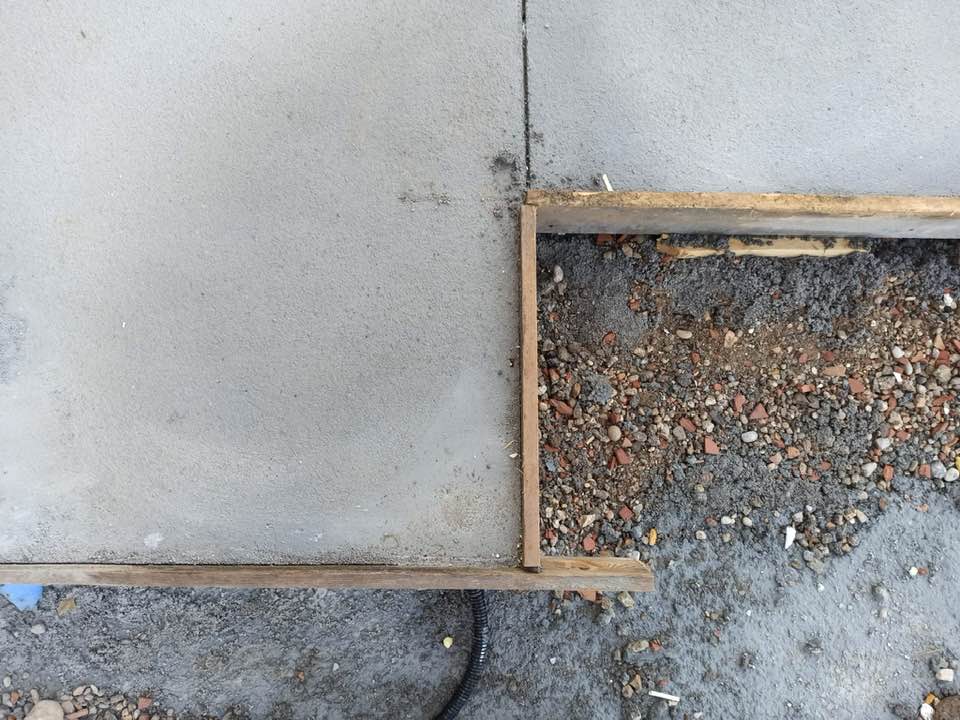
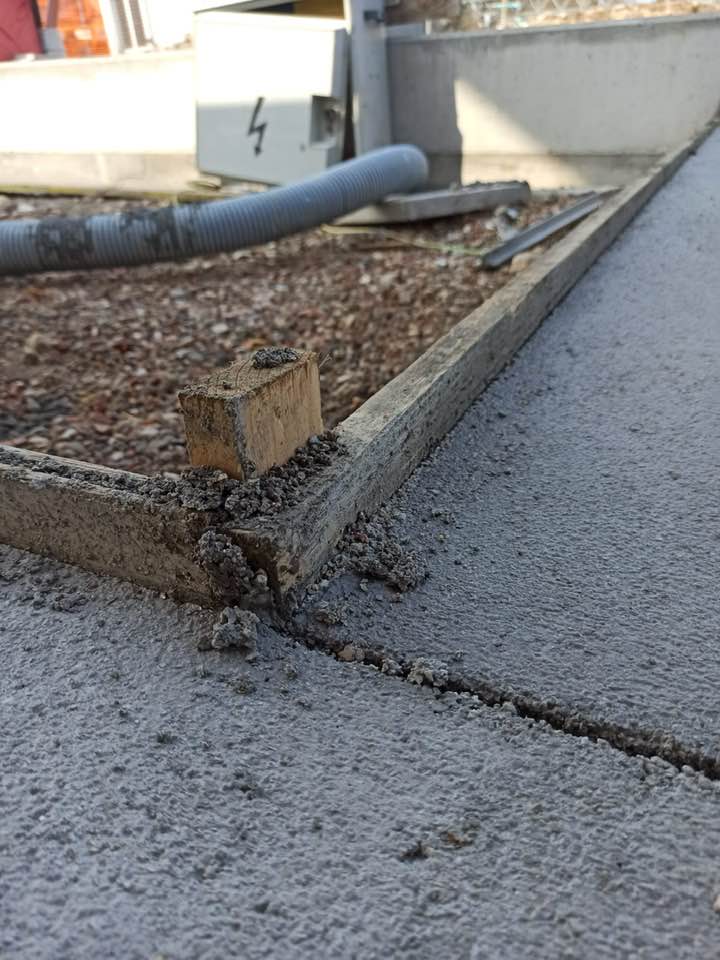
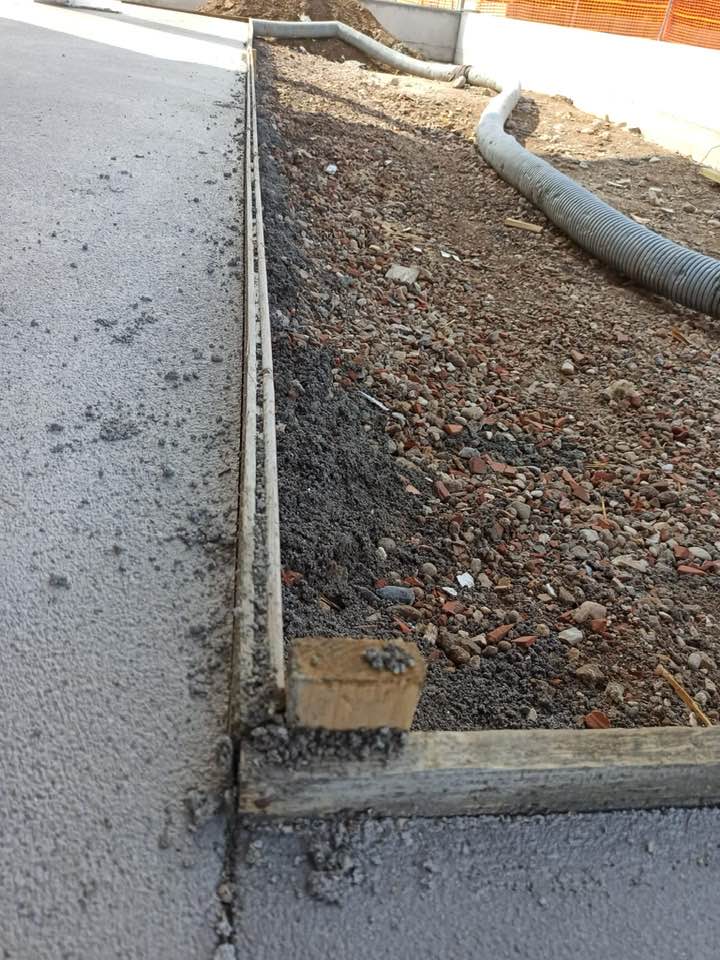
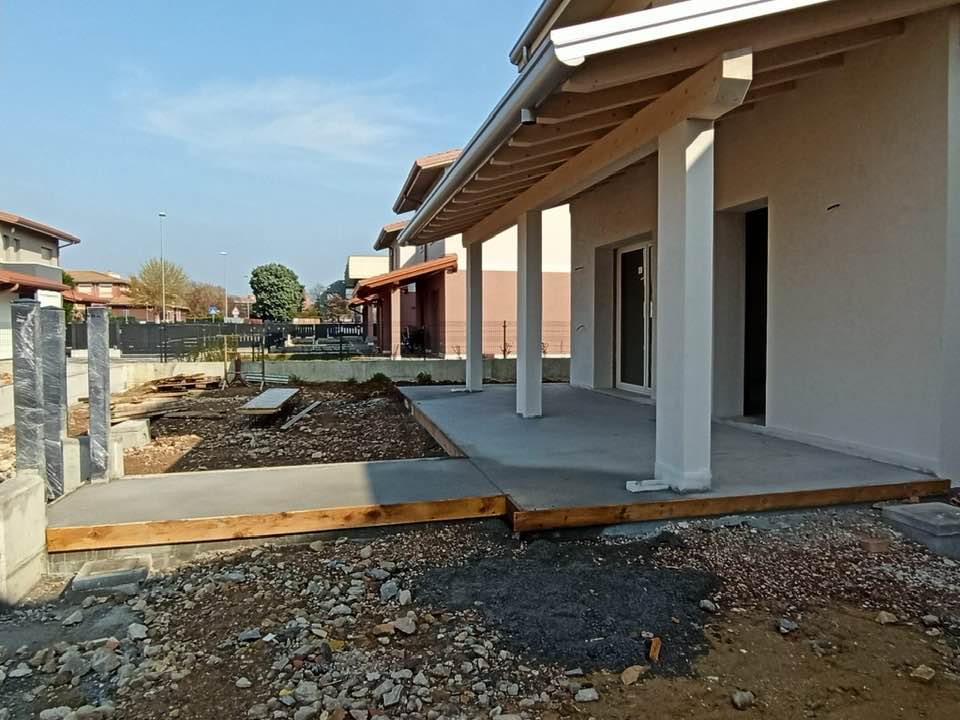
- Formwork Setup: Wooden or metal formwork is installed to define the screed’s boundaries and maintain the desired shape during pouring.
- Vapor Barrier Placement: For floating screeds, a polyethylene sheet is laid over the subbase, with perimeter strips installed along walls and other vertical elements.
- Screed Mixing and Pouring: A pump delivers a mix of sand, cement, and additives (e.g., fibers for reinforcement) to the site. The mix is carefully formulated to meet strength and durability requirements.
- Leveling and Sloping: The screed is leveled using screed rails or guides to achieve the specified slope and thickness. Perimeter “strips” are created first to establish reference heights.
- Compaction and Finishing: The screed is compacted and smoothed using a screed board or trowel, ensuring uniform thickness and proper slope without abrupt changes.
- Curing and Inspection: The screed is cured under controlled conditions (e.g., covered with plastic sheeting to retain moisture) and inspected for cracks, voids, or slope inaccuracies before tiling.
Conclusion
A well-designed and properly installed screed is the backbone of durable outdoor flooring. By addressing environmental resistance, proper sloping, adequate thickness, and protective measures like vapor barriers and waterproofing, you can ensure a long-lasting pavement that withstands the rigors of outdoor conditions. Whether for a residential terrace, a commercial loading area, or a pedestrian walkway, careful attention to screed design and installation is essential for achieving a high-quality, functional result.
For further details or to request a quote for your outdoor flooring project, including screed and finishing work, contact a qualified contractor or visit [insert relevant link or contact information].


Commenti
Buongiorno ho una terrazza e un poggiolo comunicanti per una superficie totale di circa 45mq con la guaina e chiedevo un preventivo per il massetto per poi un domani posare la pavimentazione.
Ciao Thomas,
il massetto non può essere lasciato per un periodo di tempo indefinito senza la pavimentazione. Ti consiglio di fare il lavoro nel momento in cui avrai anche deciso di pavimentare e di affidare tutto ad una stessa azienda.
Noi operiamo solamente nella province di Verona e Vicenza, se abiti da queste parti possiamo farti il preventivo sia del massetto che della pavimentazione: vieni a trovarci in uno dei nostri due negozi, a Costo di Arzignano oppure a Gambellara (Vicenza).
ciao!
Aggiungi un commento